What's New? |
Helpful tips and advice for home maintenance from your roof to your porch.
Reconditioning the roof by doing some minor patching and applying a coat of elastomeric paint can lengthen the longevity of the metal roof and enhance the look. Before you begin, recruit a contractor to inspect the roof and repair any damages.
Things You Will Need
Tip
Warning
For more information or to schedule a free estimate, contact Boyd Construction Co Inc online or call 202-223-ROOF
2/14/2017
Roof painting tips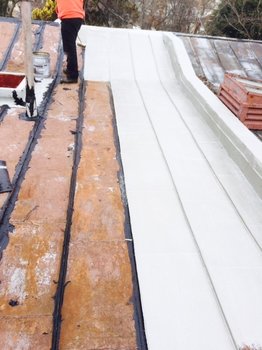 Roof Painting
Painting a roof can be dependant on what type of material your roof is made of. No matter what material your roof is made of the first step is always to clean your roof. Cleaning Your Roof The best way to clean a roof is to use a high pressure power washer, especially those roofs that have a rough surface. A high pressure washer will help remove the mould from within the pores of the surface. Painting a Corrugated Roof A new iron roof will need to be washed with a degreaser first, before you start painting. However if the roof is more than a year old and has weathered more than likely the oil from the fabrication has worn off and the iron will have been slightly etched from the weather, and you will not have to use the degreaser. Unpainted iron will need to be primed first with a suitable primer, which is also important for any sheets of iron that may have been replaced on an existing roof. Two coats of recommended paint. The choice of color is up to you. Remember lighter colors will reflect the heat and darker colors absorb the heat. The quickest way to paint any roof is with airless spray. If you decide to paint your roof this way there is a specific technique to applying the paint.
Painting a Tiled Roof Painting a tiled or shingle roof is usually because existing glaze has worn off and the roof is looking a bit shabby. With tiled roofs there is an issue with ridge capping. They may need to be repointed and re-bedded before painting. If the color has gone then you will need to sealer the roof first. Apply generously. Again airless spray is the quickest and best way to paint a tiled roof.
Roof Painting Tips
Roof Paint
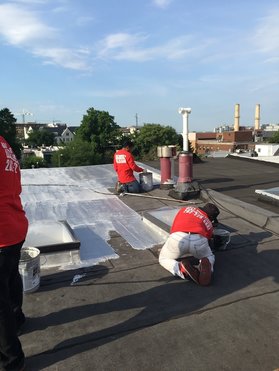
The most common types of roof coatings are bituminous-based (solvent-based) and polymer-based (water- or solvent-based). When applying a roof coating, be sure to use a product compatible with the substrate on which it will be used. Common substrates include polymer-modified bitumen sheets, single-ply membranes, built-up roof membranes and metal roof panels. Be sure to follow all applicable code requirements. Also, follow appropriate safety measures such as wearing safety glasses, gloves and any other personal protective equipment outlined in the product’s material safety data sheet. To select a roof coating, most manufacturers recommend roofing professionals use ASTM International- or code-compliant products at the proper application rate that meet the requirements of some or all of the following organizations: • Underwriters Laboratories Inc. • FM Global • Cool Roof Rating Council • Title 24 • ENERGY STAR® Although every roof system is different, there are general best practices to follow when applying coatings.
2. Surface preparation is a critical step when coating a substrate. The area should be clean and dry before coating application. To ensure a clean substrate, inspect the surface for debris and loose dirt, as well as any water near roof imperfections. If using a water-based coating, pressure wash the surface before coating application, and always blow or power broom a surface before applying solvent-based coatings.
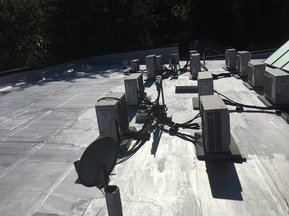
3. Prime the surface to promote adhesion if required by the coating manufacturer. Solvent-based aluminum coatings 1. Always mechanically mix aluminum coatings with an electric drill with an appropriate mixing/stirring bit—rolling the pail on the ground or stirring with a stick do not count. 2. Primer complying with ASTM D41, “Standard Specification for Asphalt Primer Used in Roofing, Dampproofing, and Waterproofing,” should be used sparingly before coating application if needed. An option for aluminum roof coatings (water- or solvent based) is using an asphalt clay emulsion for a base or primer coat. 3. Apply the coating at the manufacturer’s recommended coverage rate and number of coats. 4. Fibrated coating should be applied using a brush or spray. If a roller is used improperly, it may push the fibers away from the coating, leaving the customer with few or no fibers in the coating. 5. Non fibrated coating should be applied using a roller or spray. If a brush is used for application, an uneven coating above the manufacturer's recommended application rate will occur. 6. Always apply aluminum coatings in one direction; application in multiple directions will affect the coating’s aesthetics because of changes in the pattern of the leafing aluminum paste. 7. Use the appropriate spray tip for the specific product and application. Water-based aluminum coatings 1. If required, mix the coating. 2. Apply the coating at the recommended coverage rate. 3. Typically, water-based aluminum coatings are applied with one coat. 4. Apply the coating using a brush, roller or spray. 5. Use the appropriate spray tip for the specific product and application. 6. Check for pinholes and thickness. Pin holes left unchecked will allow water to migrate under the coating, eventually causing blisters. For more information or questions on getting your roof aluminized contact Boyd Construction Co Inc for a free estimate. |
Boyd Construction CoFamily owned and operated in the greater Washington DC area since 1932. Archives
September 2019
|

 RSS Feed